
by Wren McMains
|
Sponsored Links:
|
Batch processing also allows you to rotate and crop images, adjust colors or color depth, but personally I don't use these features much. (I normally crop images individually using the FastStone Crop Board feature, or the Crop Tool if I'm already in Photoshop. For color adjustment I use the features of Adobe Camera Raw, which can be done in a batch process using Bridge.)
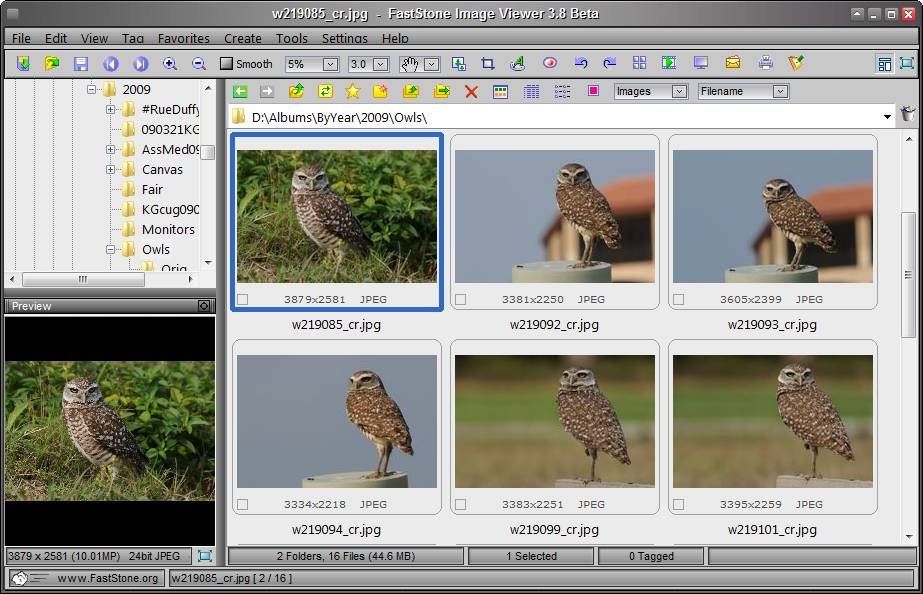
Let's say we want to create a set of lower resolution images. The first step is to select them using the Browser view. As you single click on an image a blue box appears around it, indicating it has been selected:
Using the standard Windows technique for selecting files at random, hold down the Ctrl key and single-click on the other images you want to select. You'll notice blue boxes appear around each:
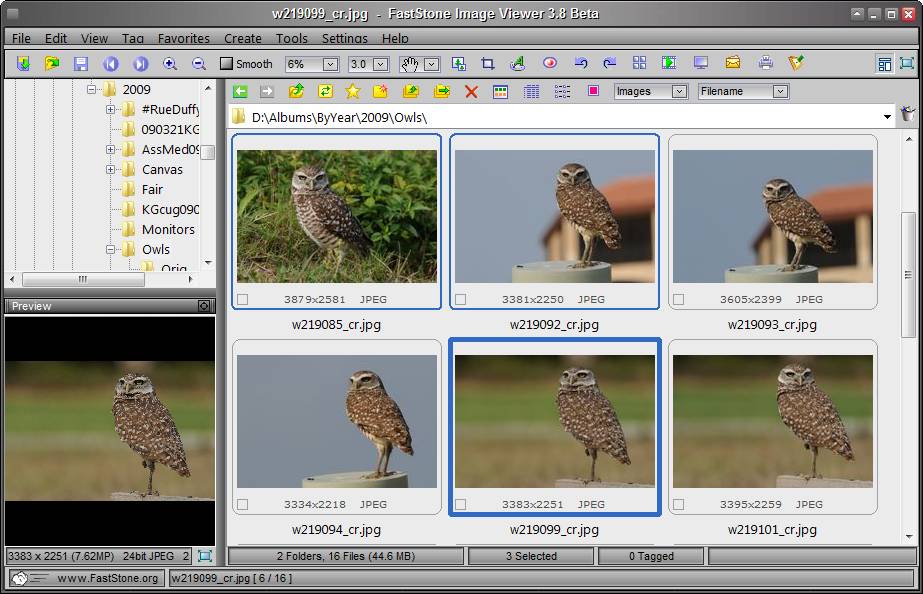
To select several images in a row, use the Windows technique of selecting the first, and holding down the Shift key and selecting the last. By holding down both Ctrl and Shift you can add a range of images to the current selection.
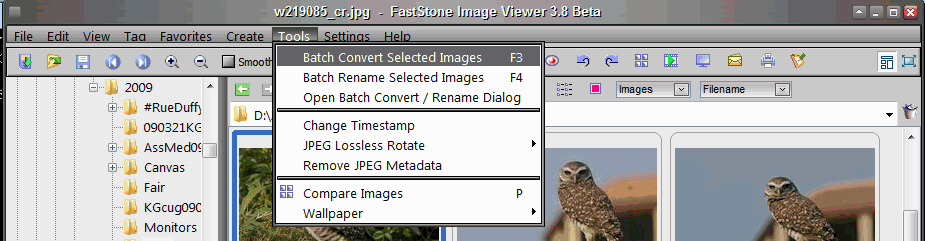
Once you've selected the images, choose Tools / Batch Convert Selected Images (or just press F3):
(Note, if you just want lower resolution for e-mailing I recommend using FastStone's e-mail feature.)
The Batch Convert Dialog Box looks like this:
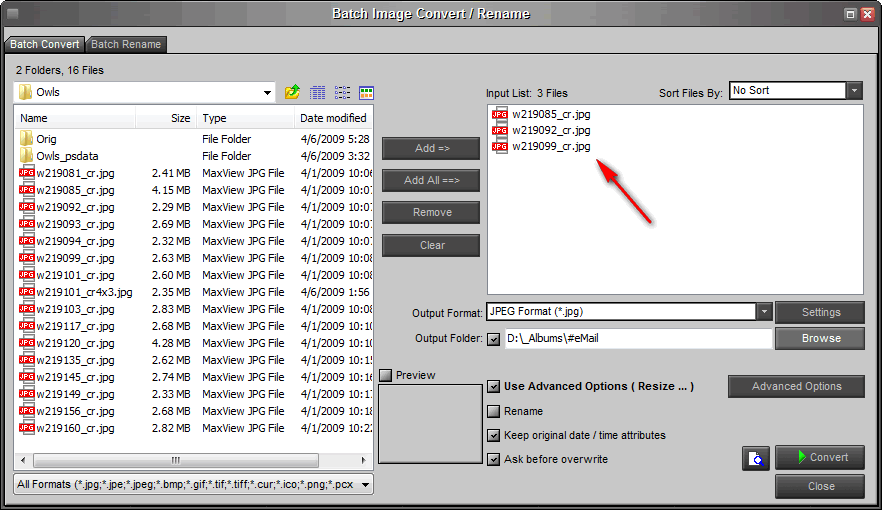
As you can see the selected images are listed on the right. (You can add or remove images from the list to be processed, even images from another folder, but I almost never do, it's easier just to select all the images you want first.)
The first thing I do is check the output format and settings:
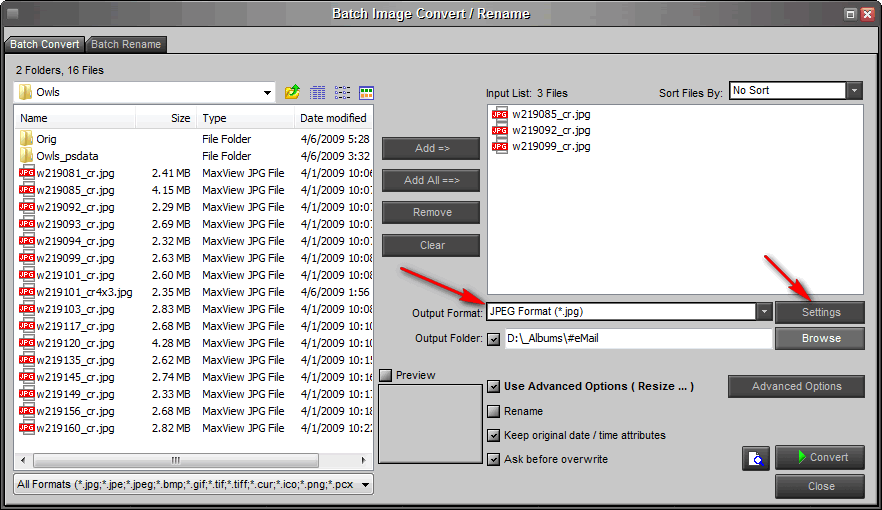
FastStone remembers the settings you used in your last conversion, so if you've just done a conversion you can skip this and maybe other steps. Normally you'll want to be creating JPG files. With JPGs, clicking on the Settings button gives you this dialog box:
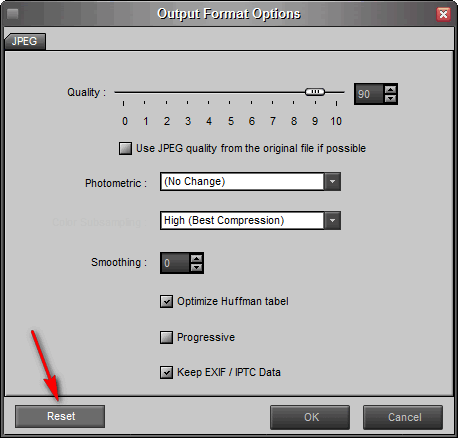
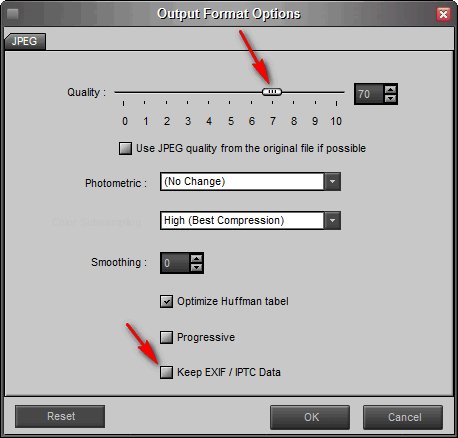
Above you see the default settings which you can return to at anytime by pressing the Reset button. There are two things I change depending on how I'm going to be using the images I'm creating.:
The next thing to review is the folder where the output images are going to be placed:
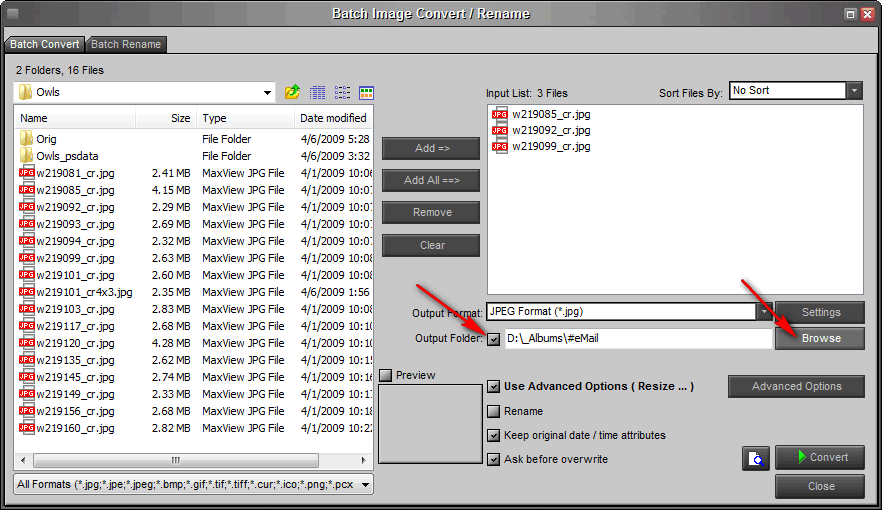
Above you see I have a folder named #eMail where I put low resolution, e-mail/web quality images. To select a different folder click on the Browse button.
The third thing to always check are the Advanced Options:
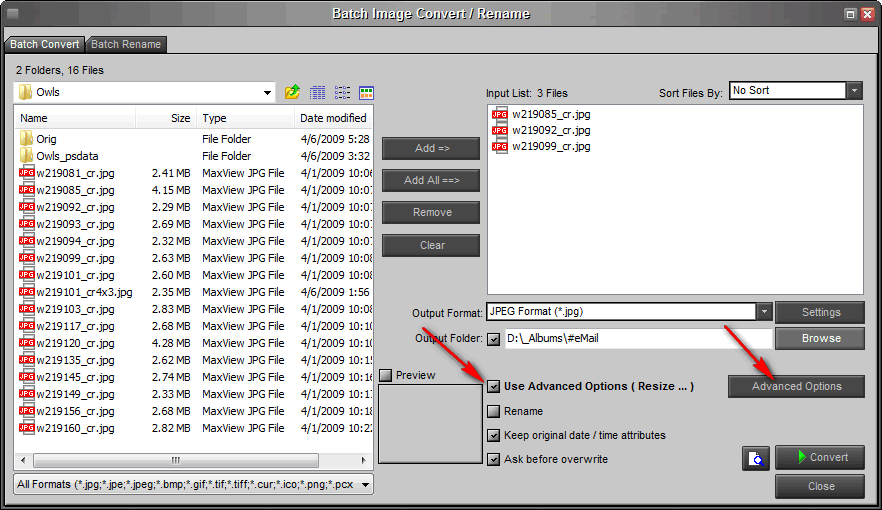
Clicking on the Advanced Options button gives you:
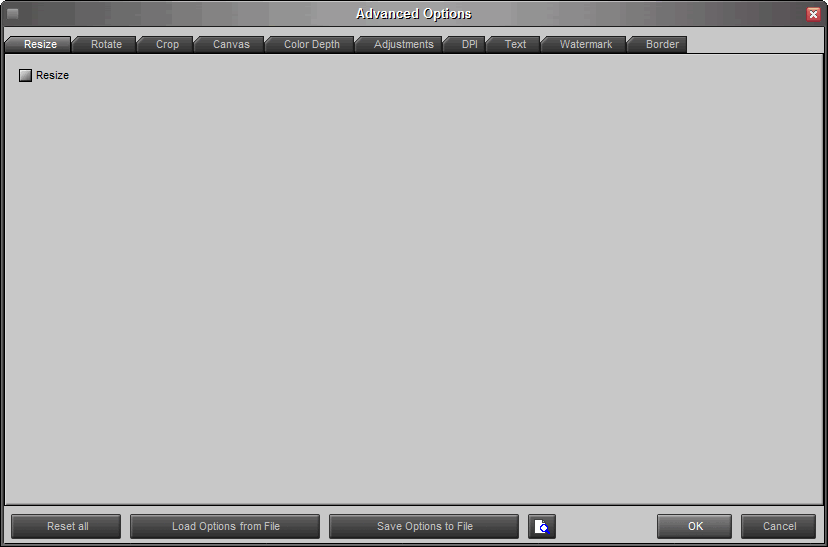
As you can see, there are lots of tabs (they're across the top with names like Resize, Rotate, Crop, etc.). You can tell which Options are being used by little green dots on the tabs. As soon as an option is applied, by checking the box in upper left of the tab, the green dot appears:
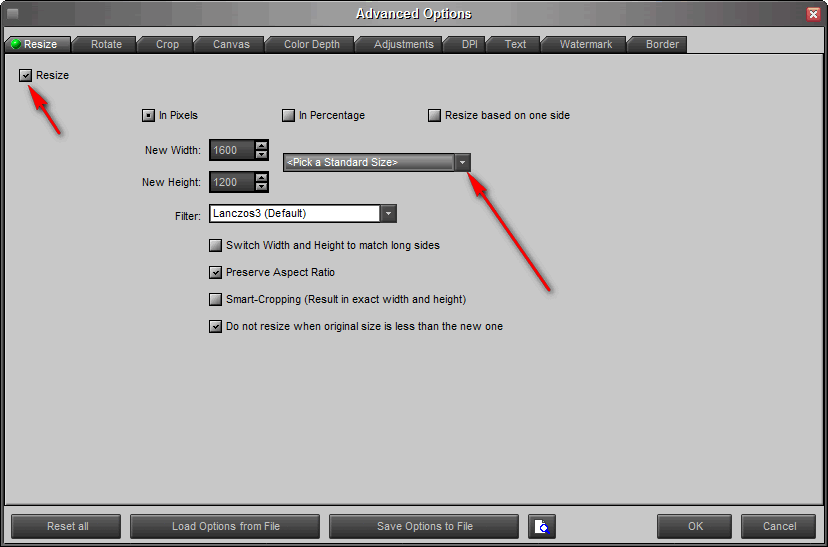
Here I picked resizing to 1600 x 1200 from the Standard Sizes pull-down, but obviously you can fill in any size. Other boxes I always check are: Preserve Aspect Ratio and the bottom on which keeps it from making a big image out of a little one. Another one you may want to check is the Switch Width and Height one ... I don't use it when creating images for web pages, but most of the time it makes sense.
1600 x 1200 may seem large for an image to be e-mailed, but FastStone does a great job of compressing at quality 60 or 70 and if your recipient has a high resolution screen this will give them a large image which probably fills their screen. However, for the average computer screen I recommend resizing to 1024 x 768.
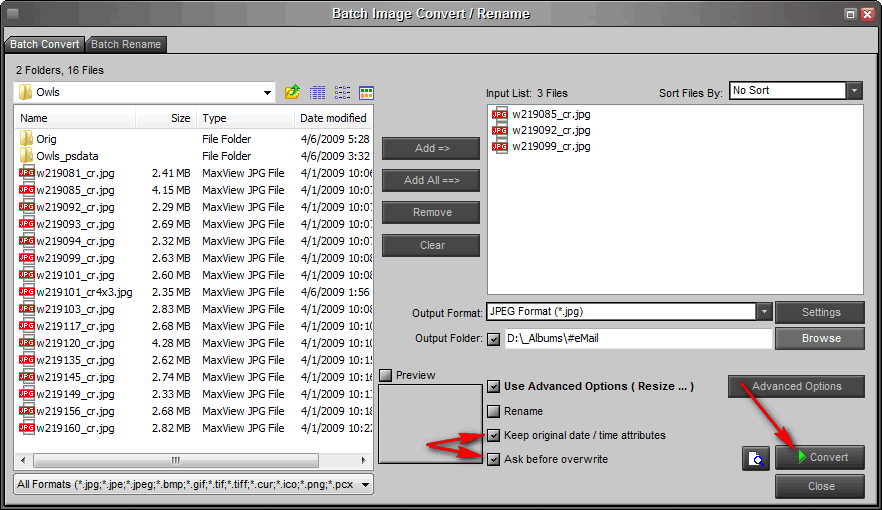
Once you've set all your Options, click on the OK button (bottom right above).
Now you're ready to do the batch conversion. To start just click on the Convert button. I normally also check both the "Keep Date/Time" and "Ask Me" buttons:
It lists the images as they are converted. Note the New Size and Ratio columns, FastStone compressed these images from 95-97%, turning images that were something like 2,500,000 bytes into 85,000 bytes (and in the bottom right you see it only took 3 one-hundredths of a second):
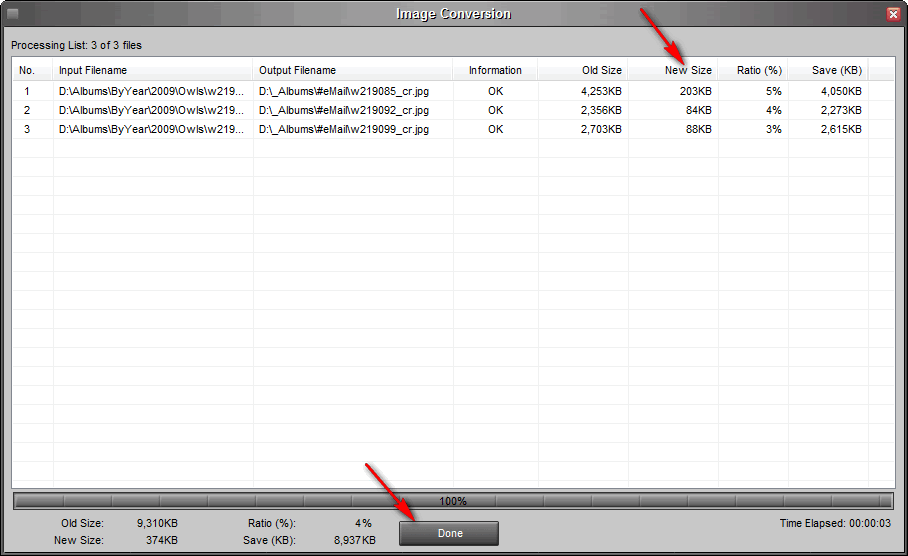
To dismiss this screen, click on the Done button, or press the Enter key.
Check back, sometime in the future we'll explore some of the other Advanced Options. But remember, before pressing the Convert button always review the:
We often assume they're right, but I know from experience they're often not ![]()
Suggested next choices:
ImagingTips.com Site Map
![]()
[an error occurred while processing this directive]