by Wren McMains
|
Sponsored Links:
Sponsored Links: |
The Settings dialog box has 11 tabs, click on the tab name below to jump to a discussion of that tab:
Viewer Thumbnail Magnifier JPG RAW Dual Monitor CMS Associations Favorites Programs Music
These are the default settings on the Viewer tab (accessed from the menus or by pressing F12):
The defaults are really pretty good, any changes are a matter of personal preference or to make FastStone work better with your hardware (in particular your pointing device). We can look at some of these options in more detail later, but for now let me just point out the options I've changed:
I use a Wacom Tablet instead of a mouse with my desktop and the touchpad on my laptop; this setting allows me to advance through the images in full-screen mode on either machine with a single tap:
![]()
Tip: Almost every tab in settings has a Reset Button in the bottom left corner which will return all the settings on that tab back to their default settings.
Here are the default settings on the Thumbnail tab:
To learn more about Thumbnails, both in FastStone and Windows, see my Thumbnails page.
Here are the default settings on the Magnifier tab:
And the changes I've made:

The only reason I make these changes is because I like the look of a magnifying glass, you make prefer the full-screen mode.
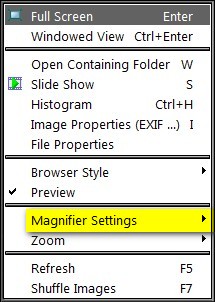
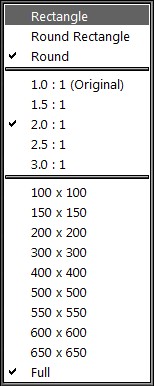
In addition to changing the magnifier settings on the tab above, you can also quickly change them from the menu: View / Magnifier Settings:
 or
or 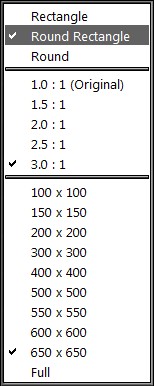
Here are the default settings on the JPG tab which you probably won't need to change:
The thing to remember is that if you're saving images to e-mail or use on a web page, you want to use a JPG Quality of about 70. If you create a lot of web pages, you might want to change the setting here to 70, otherwise, go with the default of 90. The other setting you might want to change is "Use Quality from original file", but again I usually leave it checked here and override as necessary.
JPG Quality is another way of talking about how highly compressed an image is when stored. Each program has it's own way of measuring compression, or quality. Photoshop uses a scale of 1-12 and names a few of them: Photoshop calls 10 Maximum, 8 High, 5 Medium, and 3 Low. As you see FastStone uses a scale of 1-100. Original, best quality, images from one of my cameras have a quality of 98 on this scale. The table below shows the file sizes of a single image saved at different Quality settings using Photoshop and FastStone:
| w/EXIF | wo/EXIF | |
| Original 12 Mpix Image | 5,280 KB | |
| FastStone Quality 90 | 1,962 KB | 1,898 KB |
| FastStone Quality 80 | 1,256 KB | 1,192 KB |
| FastStone Quality 70 | 920 KB | 984 KB |
| Photoshop Maximum Quality (10) | 2,490 KB | |
| Photoshop High Quality (8) | 1,409 KB | |
| Photoshop Medium Quality (5) | 783 KB | |
| Photoshop Low Quality (3) | 609 KB |
Compression will vary from image to image, but the numbers above are somewhat representative. (Although my experience is that normally FastStone does a better job of compressing than Photoshop, and images compressed with a Quality of 70 in FastStone are usually smaller than one saved from Photoshop with "Low Quality (3)".)
Bottom Line: I never use a quality of less than 60 in FastStone. On medium size images I can start to see compression artifacts with quality of 55 or less. On small images I can sometimes see them with a quality of 60, so that's why I usually go with 70 when I want fairly highly compressed, but still good looking, images.
The default settings:
I recommend being aware of your options for viewing RAW files:
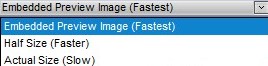
I typically batch convert my RAW files to JPG for viewing, so when I'm in a folder with RAW files I'm typically just looking at thumbnails to pick images. Therefore, I tend go with the default (the embedded image). If you let FastStone convert the RAW file for viewing, it takes several seconds to view the next image (instead of being able to view it almost instantly like we're use to in FastStone).
Tip: As it says, if you want to see the converted actual image, use press the A key.
FastStone can batch convert RAW files to give you JPGs for viewing. (Currently I use Nikon Capture NX2, but it's a lot more expensive than FastStone; there are also other good RAW converters including Bibble, which I use to use, and Adobe Bridge.) If you do use FastStone for batch RAW conversion you might want to consider the high quality color option ... since I don't use this feature, I can't say if it's worth the extra time or not. If you do some tests, let me know the results.

If you don't have a second monitor, you can't get to this tab. I use two monitors, and usually use the "Preview" on second monitor option (but not always). As for the second choice, that's totally a matter of preference depending on your monitors. For example, the second monitor on one of my computers is a projector and I always want the slide show to run there.
I assume it's worth the time to turn on this option, but I need to do more testing.

Personally I associate another FastStone product, MaxView, as the default program for opening any image; therefore, I use the default (Select None). If you don't have MaxView, I would recommend you "Select All" and let FastStone Image Viewer be the default program for viewing images.
I use MaxView for two reasons: it is extremely fast to load (so viewing is almost always instant) and it doesn't interfere with what I might be doing using FastStone in another window.
Normally to add the current folder to your Favorites list you would use the Favorites Icon on the Tool Bar. Use this dialog box to organize your favorites by selecting one and moving it using the up and down arrows. You can also delete an individual one by selecting and using the Remove bottom or you can delete all of them with the Clear button.
The power of using FastStone to view and organizing images is that with a single key stroke (E or Alt+#) you can work on the current image in any graphics program of your choice. As you can see, I setup Photoshop as my primary editor (top program in the list, accessed by the letter E). Because I sometime demo working in Elements I also add it as another Editor. My third external program is FastStone MaxView because sometime I want to keep and image open (in MaxView) while I switch to another folder in FastStone Image Viewer (because it is the 3rd external program, access is via Alt+3). Other external programs I use are Qimage for printing and Capture NX2 for RAW conversion and keyword tagging.
Add external programs by using the Add button and finding the .exe program (usually under manufacturer's name in the Program Files folder ... don't be confused by what you see above, I install programs differently on my machine (I install all graphics programs in a Graphics folder that I can access from other machines on my network).
If you select (highlight) an External program in the list you can remove it from the list using the Remove button, or change its order with the up and down arrows.
I setup exactly the same external programs in MaxView, with the exception that there I replace MaxView with FastStone Image Viewer, making it easy to jump from MaxView to Image Viewer.
This is where you organize music for use Slide Shows. You can either add tracks here or by using the shortcut in Slide Show Builder which takes you to this screen. You can remove tracks by highlighting them and using the Remove button, or reorder them by using the up and down arrows.
Thanks to the efforts of users around the world, FastStone now supports a great number of languages including:
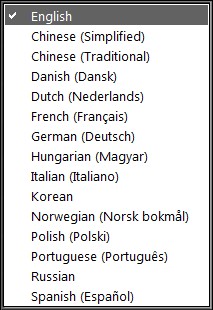
However, if you've managed to read this far, I assume you understand English and will probably want to stick with the default. If you do change the Language, FastStone will restart and both the Tool Tips and the Help will be in the requested language.
Suggested next choices:
ImagingTips.com Site Map
![]()
[an error occurred while processing this directive]