Adding your signature to an image you're going to print is as easy as 1, 2, 3:
Creating your Signature BrushSummary:
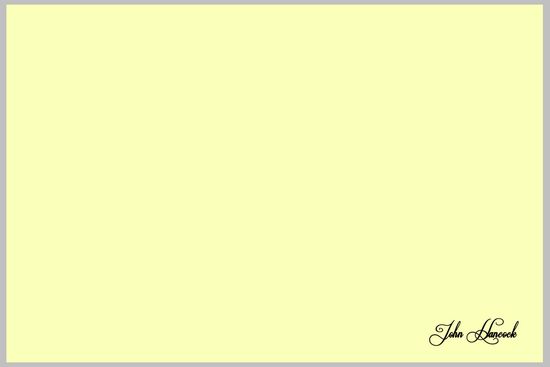
The easiest way to create a signature brush is using the text tool. You don't have to, but I recommend starting by setting your foreground and background colors to Black and White; these are the default colors, the shortcut key is the letter D for Default. Create a new document with a size something like 1500x2500 pixels:
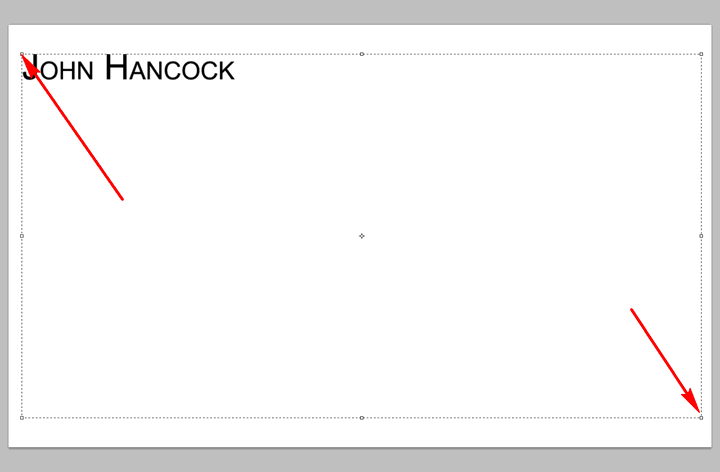
To avoid problems later the mode should be RGB, which is probably your default. Place a text box that takes up almost the entire document and type your name:
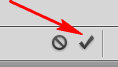
Next you're going to want to change the font and the size of the type, but instead of selecting the type and trying to change it inside the text box, commit the text you've typed by clicking on the Text Tool "Check Mark" or pressing Enter on the Number Pad (this is not the same as the Enter key on the keyboard which adds a second line of type):
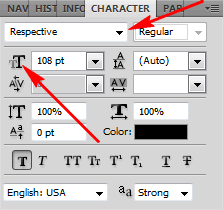
Here I change the font using the pulldown. Since we want to type to almost fill the 2500 pixel wide text box, that pulldown doesn't give you enough choices. You need to type in a size or better yet use the scrubby slider (arrow below) which let's you see exactly what size will fit:
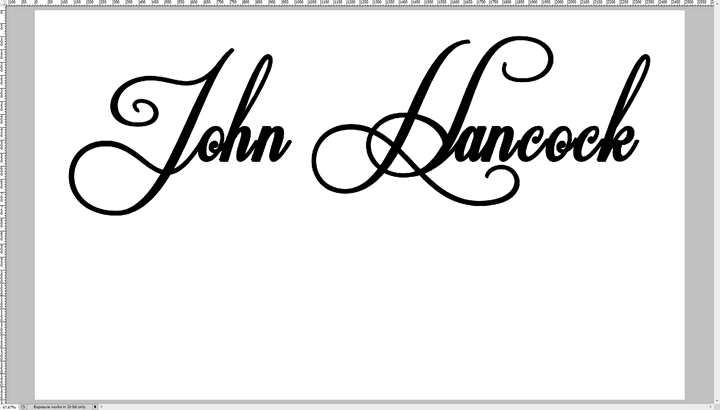
The text now looks like:
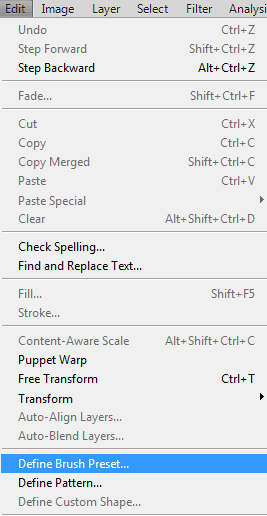
Choose "Edit / Define Brush Preset ...":
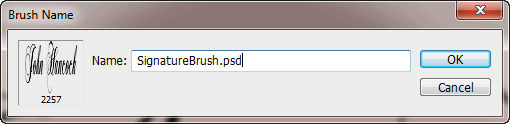
By default it will name the brush based on your image name (including the .PSD extension):
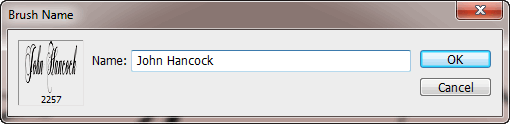
Change the name:
Your new brush will be the the last one on your brushes palatte (until you add more or reorganize them). On the image you want to apply your signature to, create a new layer. Choose your signature brush ... initially it will be huge, use the bracket keys ( [ and ] ) to resize. The click once to apply where you want it:
Then change the opacity of the layer to keep your signature from drawing attention and detracting from the image:
|
Sponsored Advertisements:
Sponsored Advertisements: Sponsored Advertisements: Sponsored Advertisements: Sponsored Advertisements: |
Coming soon. Rotate signature layer. Rotate the brush before creating, add a copyright.
Coming soon.
Coming soon.
Suggested next choices:
Photoshop Bridge FastStone Qimage OtherTips Resources
[an error occurred while processing this directive]